Some basic tasks
There are a few basic things which is good to know when you solve exercises in this course:
Note
The Metals Extension will automatically detect tests and programs, compile them, and insert clickable targets in the source to make it easy to run these. Output is printed in the Debug Console.
Note
The very first time you open a project file it may take a few seconds for the links to appear as the build system performs the initial compilation.
Running Tests
To support your work with the exercises we have included unit tests which you can use to check some aspects of your solution. Understanding and running these can save you a lot of time.
As described in Workflow you run a unit test by clicking the ▶ symbol next to the test implementation (note that older versions of VS code will insert a link saying ‘test’ above the class name instead). It can take a few seconds for the link to appear as the test needs to be compiled first.
Another way to run unit tests is by opening the test tab in VS Code and clicking ▶ on the assignment project you wish to test as in the figure below:
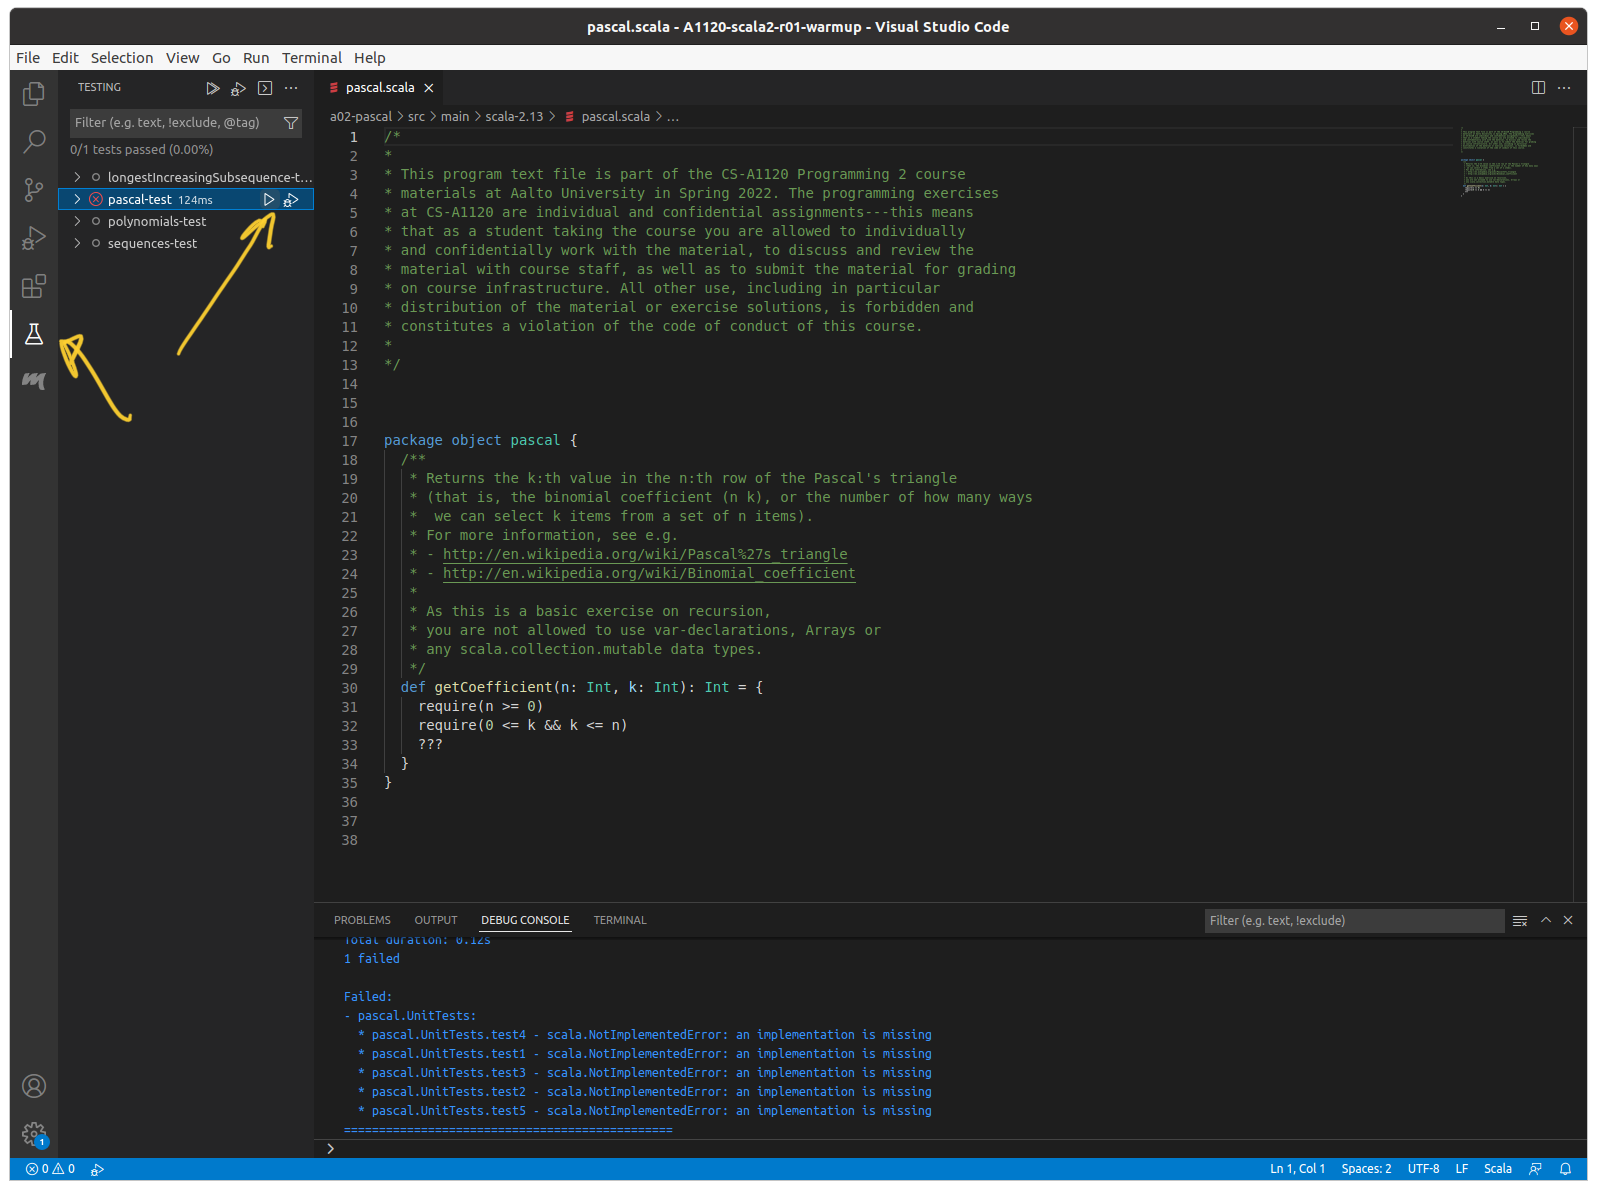
In the test tab you can choose which test you would like to run. The results are shown in the Debug Console.
Note
Unit tests and A+ grading performs different tasks. Just because your code passes all unit tests does not guarantee a full score by the grader. On the other hand, you may not necessarily need to solve all the tasks in an exercise to submit your solution for grading and get some points. Most exercises award points for every individual task, so you can get points from an exercise even if some unit tests fail. (But in the real world for professional programming, never ship code which fails a unit test.)
Running Programs
The build server will detect and compile Scala programs (objects with a main method), and insert an action link called run in the source code window.
In the source code window you will see the text run | debug appear above the main object. Clicking run will start the program.
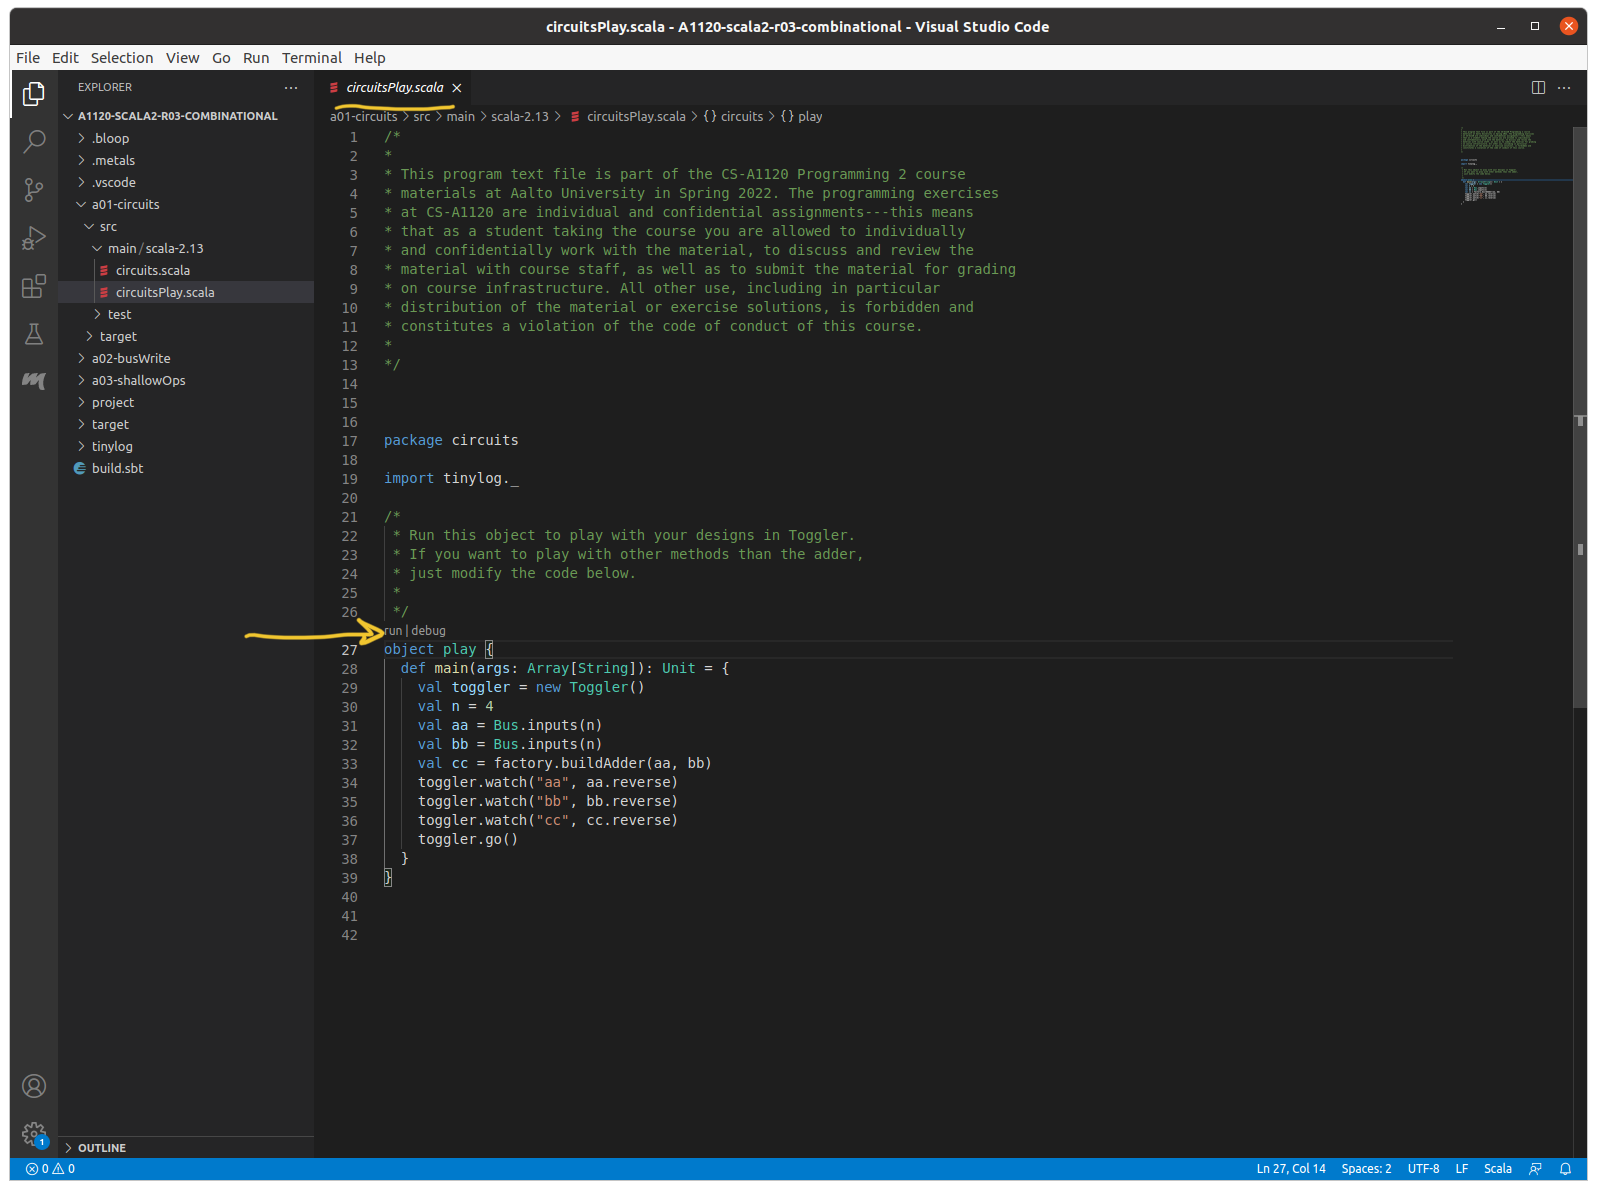
Open the file, and click on run. The program will execute.
If the program is an application with a user interface a new window will open up, but if the program only prints text to the console VS Code will display this in the Debug Console the same way as for tests.
Note
The links to run or test a program will not be shown until Metals has finished compiling the code. This means that it could take a moment before they appear, especially the first time!
Alternative ways to run a program
You can also run a main routine in an open file from the VS Code “Run and Debug” tab, or from the Code command palette (usually opened by Ctrl+Shift+p) by typing ‘metals run main’ (tests can also be run from the command palette).
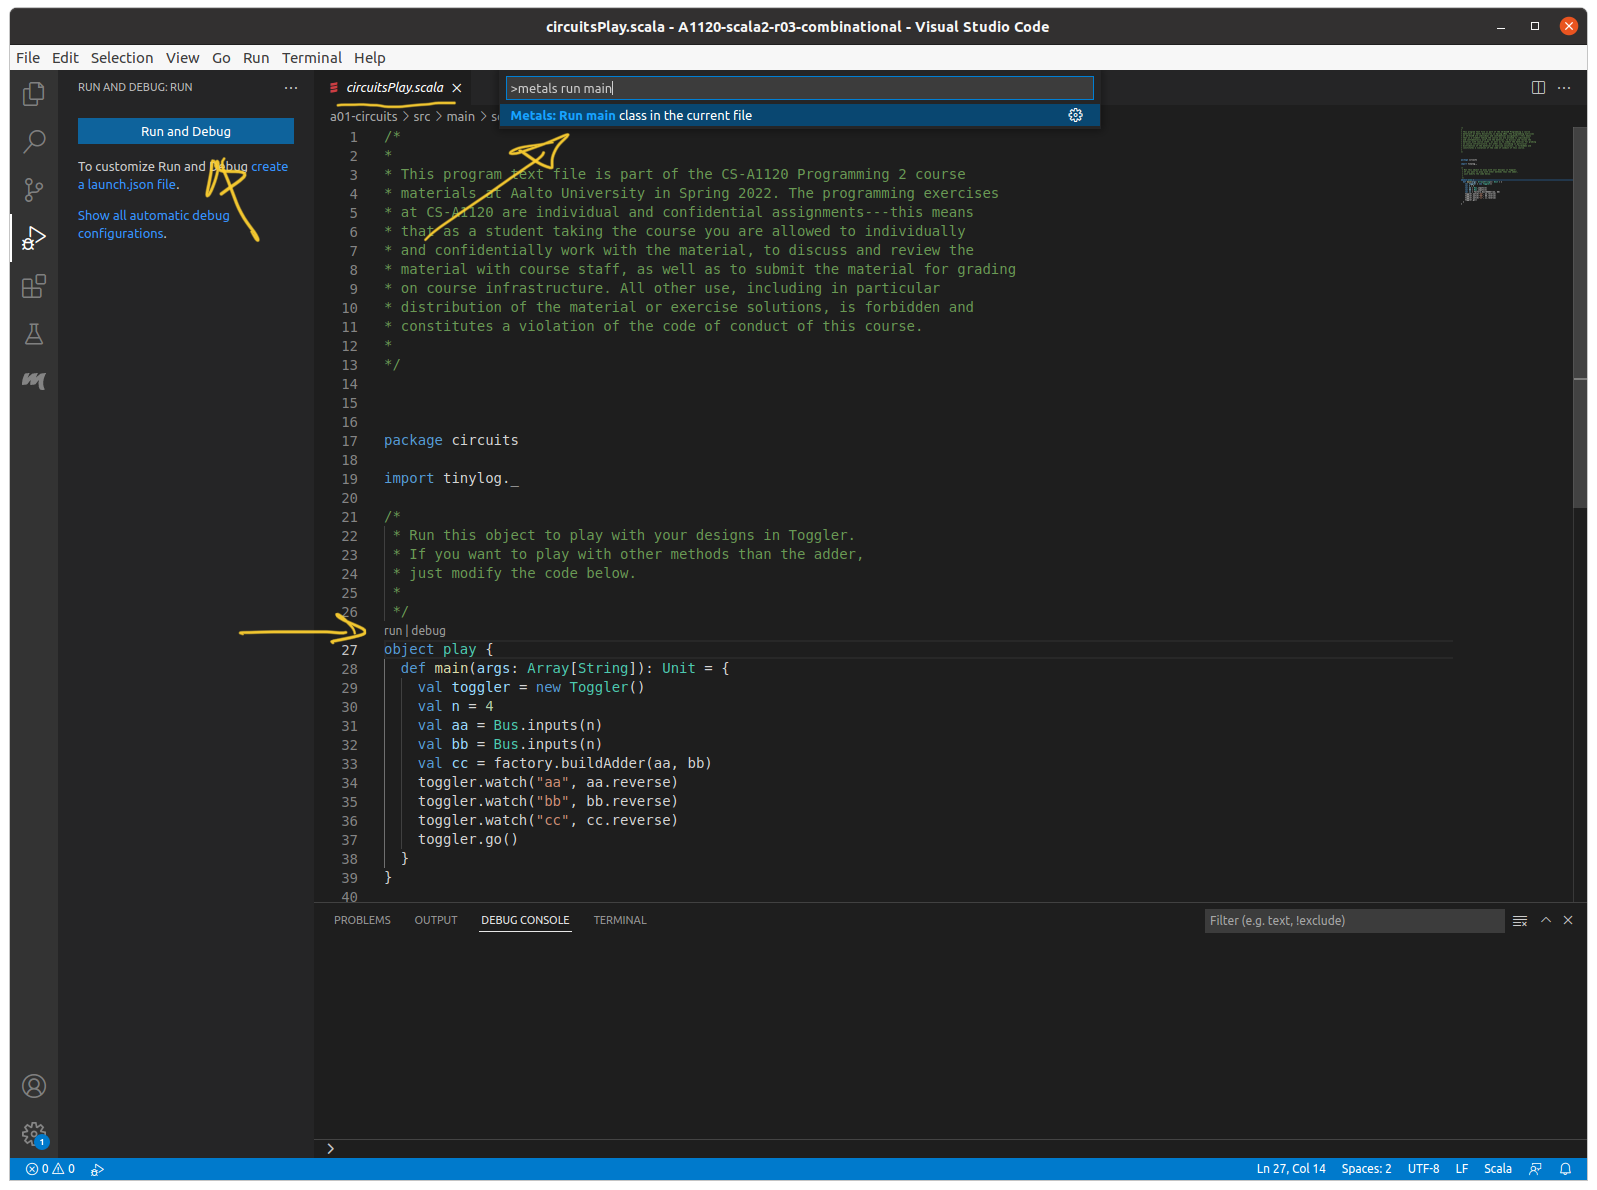
Different way to run a program in a file.
Opening an sbt console from Code
While developing your solution it is sometimes handy to be able to test things in the interactive sbt Scala REPL. To start using it do the following:
Go to View → Terminal. This will open up a system terminal in your project. Here you can give system commands just as from a normal terminal window.
Note
Use the main menu to start the terminal. Do not use the popup menu from one of the project files, this will start a terminal in the specific sub directory of that file, and the sbt console may not work properly.
Basic console: To start a basic scala console you can give the command
sbt "~console"Alternatively you can start a console aware of your assignment code: Take the name of the assignment or library you want to be able to include and put it before the console part. For example to get a console aware of the files in the assignment “pascal” (in the folder
a02-pascal). Give the commandsbt "~pascal/console". (For assignments you always leave out the ‘axy-‘part.)This will start a Scala console using the sbt build tool, and additionally tell sbt to watch the assignment files for changes in case you edit them (this is what the
~part of the command does). Note that this uses a separate build mechanism from Code, so the first time you run it you may have to wait a few seconds for the files to compile.
Giving the command
sbt "~ pascal/console"in a Code terminal tab.
Note
If the standard short-cuts pasting clipboard text is not working in the VS Code terminal try using Shift+Insert.
You should now see the familiar
scala>prompt. Now you have a REPL ready to use, why not test it with some basic Scala? If you started with the name of an assignment can also import code from packages in that assignment, if needed.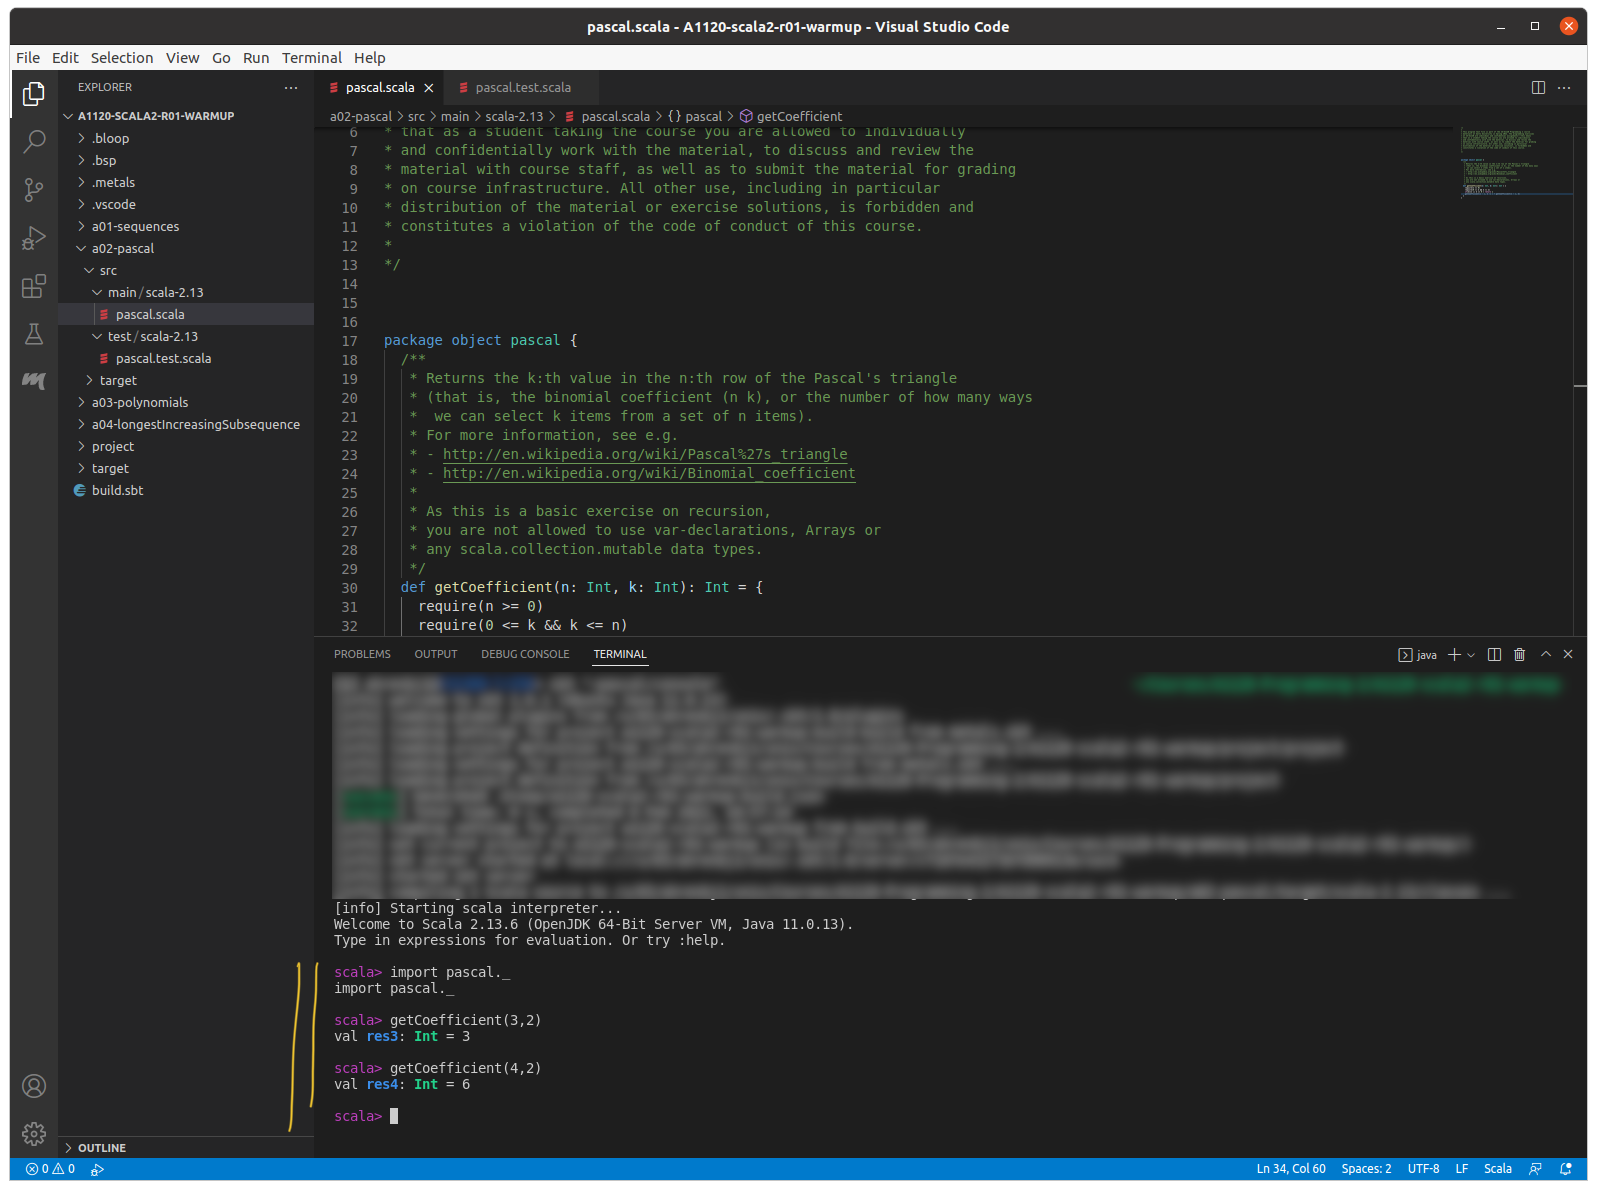
Interactive Scala in the sbt console.
Use Ctrl+d to quit the console, or recompile (if there are saved changes to your source files this will trigger a recompile, otherwise it will quit the console).
Note
If you happen to only give the command
sbtby mistake, you will enter the sbt build system (the prompt starts with sbt). That’s not a problem, just enter rest of the command there instead to start the Scala console.The console will not start if you have a compilation error in your code.
If the terminal gives an error such as command not found: sbt then you need to check that sbt is properly installed and available in your system path.
Downloading exercise projects
The programming assignments for an exercise rounds are collected in one zip archive and can be downloaded from the corresponding A+ section
When you start a round, download the package, unpack the archive, and import the project in Code as described in Workflow.
Warning
Some unzipping utillities (e.g. on Windows) will create an extra folder with the same name as the zip file. As there is already a folder in the archive make sure you import the right one (see Workflow).
The files associated with an exercise is located in a directory called a<xy>-<project>, where <xy> is the number of the assignment in the round and <project> is the name of the assignment project. If you look in the subdirectory src/main and src/test you will find the scala files associated with the assignment task and test respectively.
The tasks are marked by comments and ??? in the scala file. Read the assignment instructions in A+ and comments in the source code for hints and descriptions of your tasks.
Note
Each exercise is will give you a problem description, your tasks, and often links to helpful material and hints. It pays to read all of this carefully.
Submitting your solutions for grading
When you are happy with your solution to an exercise check wich scala files are required for submission to A+ add them to the corresponding field on A+ and click ‘Submit’. (Tip: open a system file manager from Code by right-clicking on a file tab and selecting Open Containing Folder / Reval / Reveal in Finder [depends on your OS], then simply drag-n-drop the file to the web page.)
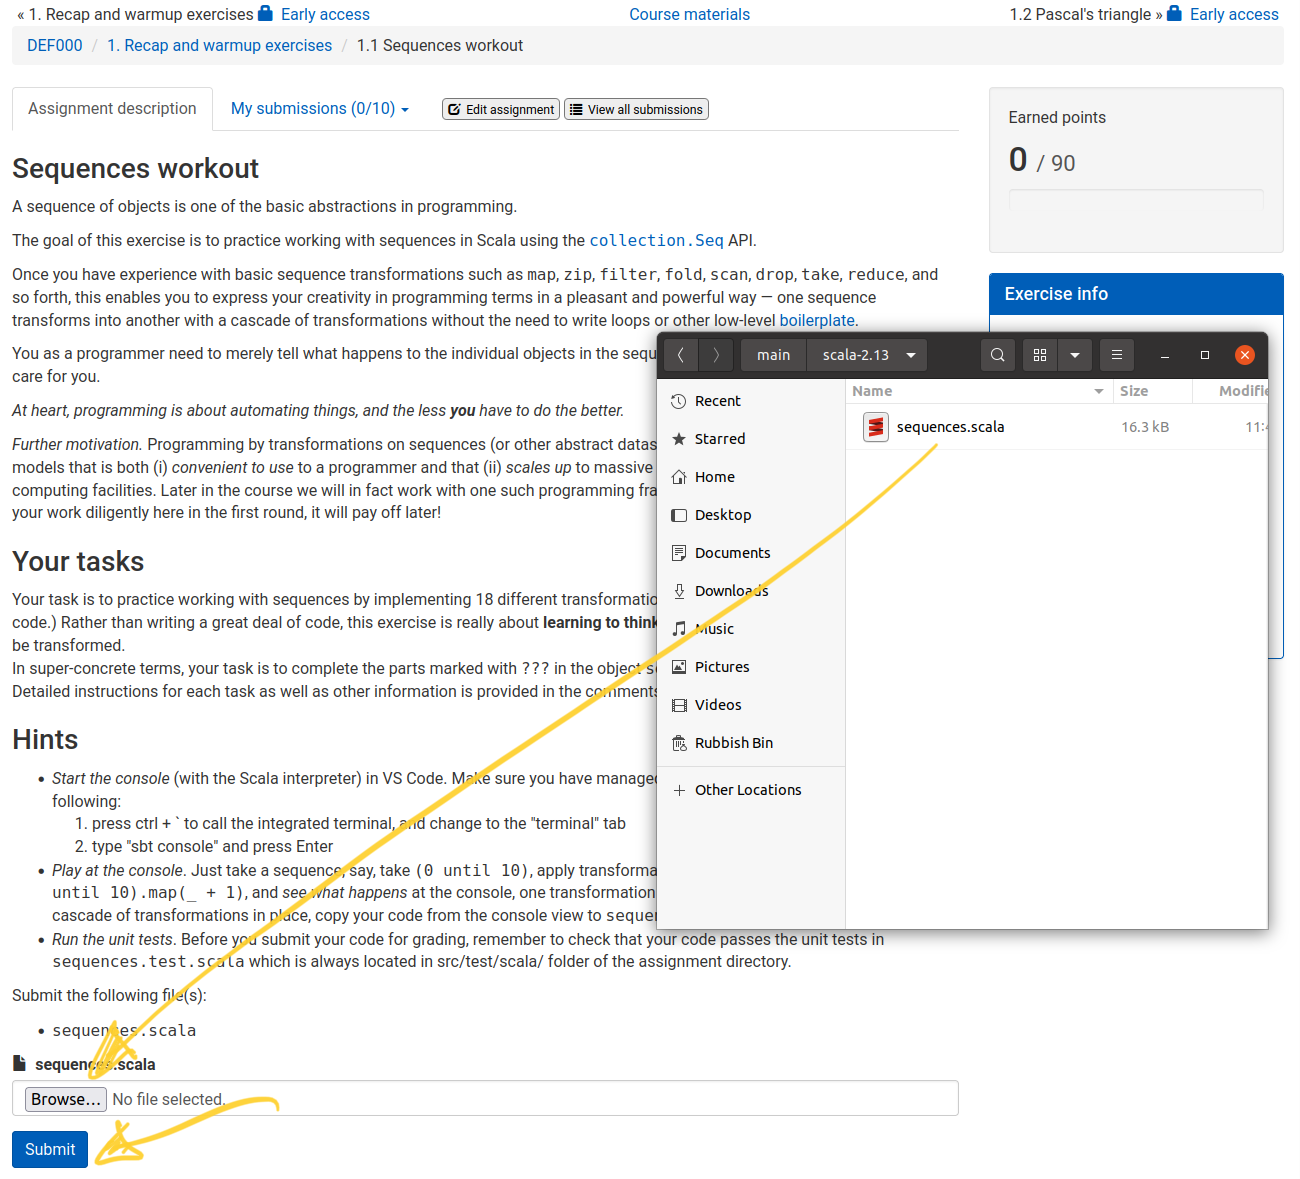
Select the required file for upload and click ‘Submit’.
Note
Most exercises will award some points for partial solutions, so it can be worth submitting your work even if you have not solved all tasks in an exercise before the deadline.
Warning
Note that A+ gives you a limited number of submissions (usually 10) for each exercise. So do not rely on the grader to test your solutions. This is what unit tests are for. Only submit when you want to be graded on your work.