Starting a Scala REPL
While developing your solution it is sometimes handy to be able to test and play around with code in a console/REPL.
(This requires sbt to be installed, see VS Code setup if you don’t have it yet.)
Open a Terminal – In VS Code, go to View → Terminal. This will open up a system terminal in your project. Here you can give system commands just as from a normal terminal window.
Warning
In VS Code Do not use the popup menu from one of the project files, this will start a terminal in the specific sub directory of that file, and the sbt console may not work properly.
Basic console: To start a basic Scala console you can give the command
sbt "~console"Alternatively you can start a console aware of your assignment code: Take the name of the assignment or library you want to be able to include and put it before the console part. For example to get a console aware of the files in the assignment “pascal” (in the folder
a02-pascal). Give the commandsbt "~pascal/console". (For assignments you always leave out the ‘axy-‘part.)This will start a Scala console using the sbt build tool, and additionally tell sbt to watch the assignment files for changes in case you edit them (this is what the
~part of the command does). Note that this uses a separate build mechanism from Code, so the first time you run it you may have to wait a few seconds for the files to compile.
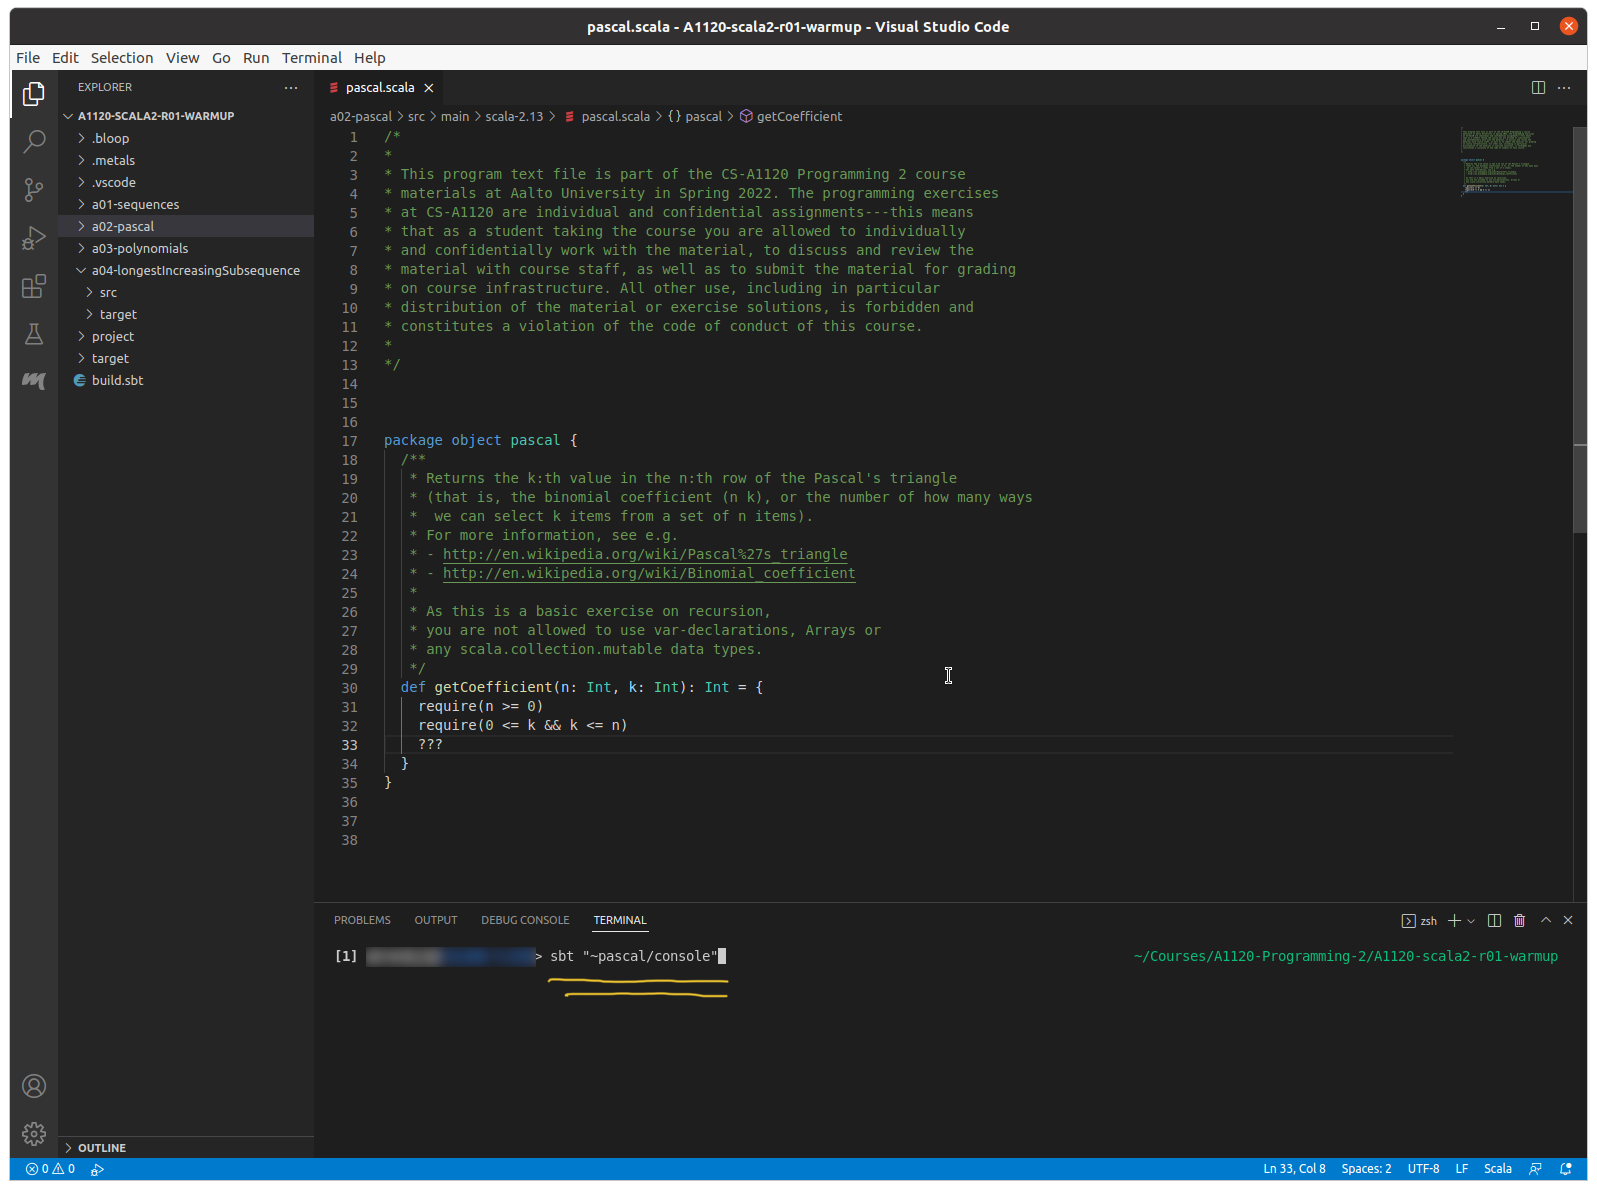
Giving the command sbt "~ pascal/console" in a Code terminal tab.
Note
If the standard short-cuts pasting clipboard text is not working in the VS Code terminal try using Shift+Insert.
You should now see the familiar
scala>prompt. Now you have a REPL ready to use, why not test it with some basic Scala? If you started with the name of an assignment can also import code from packages in that assignment, if needed.
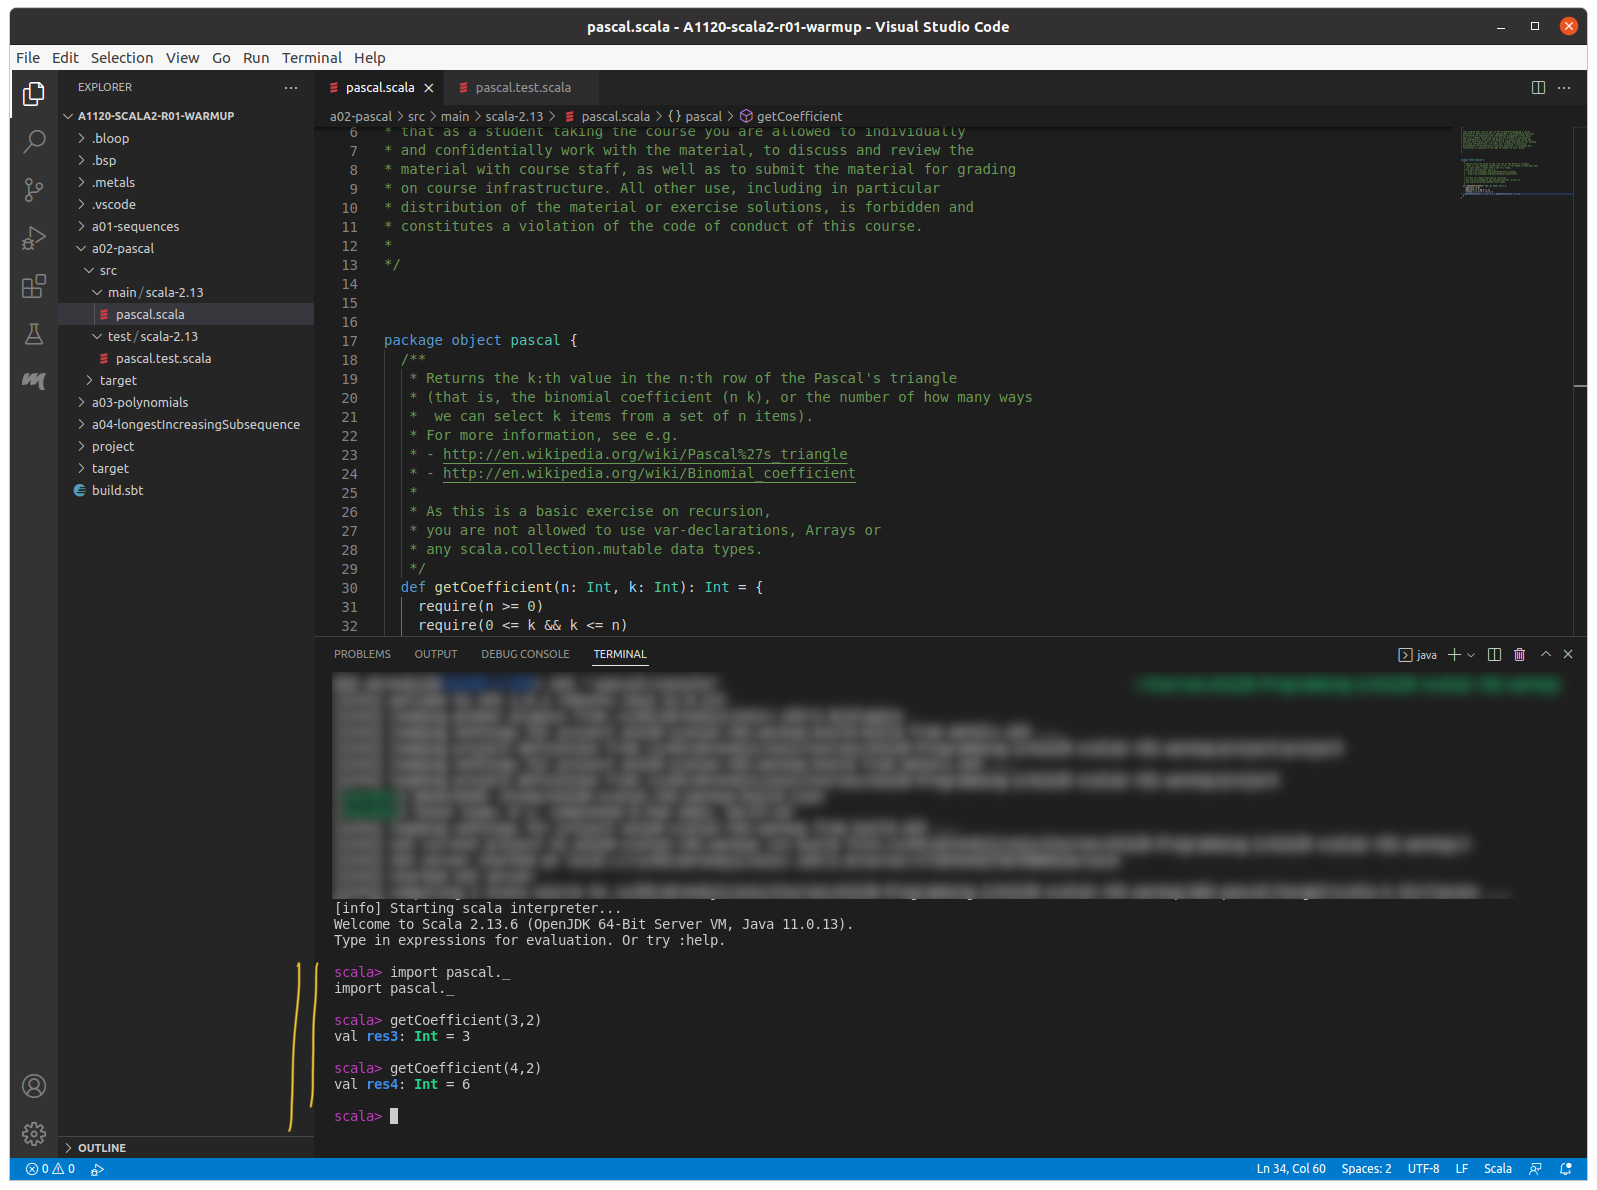
Interactive Scala in the sbt console.
Use Ctrl+d to quit the console, or recompile (if there are saved changes to your source files this will trigger a recompile, otherwise it will quit the console).
Note
If you happen to only give the command
sbtby mistake, you will enter the sbt build system (the prompt starts with sbt). That’s not a problem, just enter rest of the command there instead to start the Scala console.The console will not start if you have a compilation error in your code.
If the terminal gives an error such as command not found: sbt then you need to check that sbt is properly installed and available in your system path.
This assumes that you have the IntelliJ plugin REPLace (by LeTech) installed (or the A+ plugin which in turn installs REPLace). See IntelliJ Setup for if you lack it.
Right-click on the particular exercise in the Project tab where you want to open the REPL For example, if you want to open a REPL and include code from the sequences exercise, right-click the
[sequences]exercise in the list.Choose the option Scala REPL …
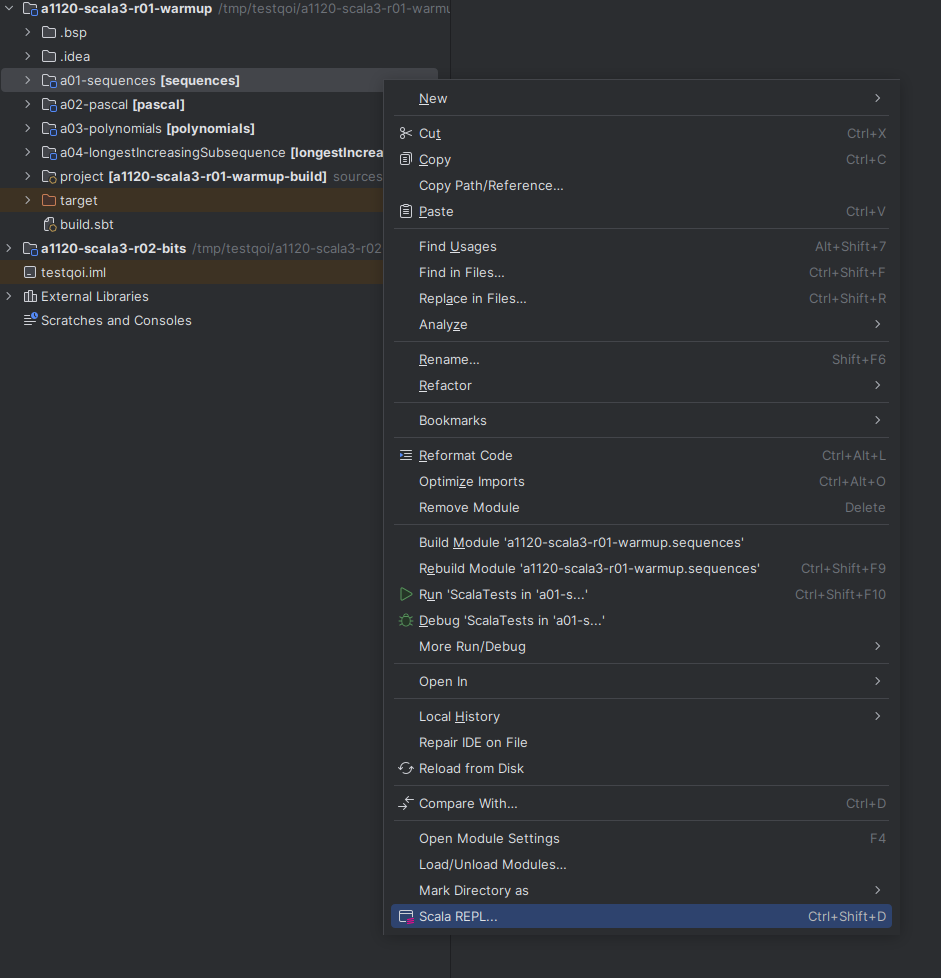
Right-click on exercise in Project list and select Scala REPL….
Now you are able to
importcode from this particular exercise into the REPL.(Note that if you change your source files, you need to re-open/reload the REPL.)
Trouble-shooting
Problem importing module
If you use REPLace as instructed above, but you can not import the module, try opening the Scala REPL by right-clicking on one of the scala files inside the project instead:
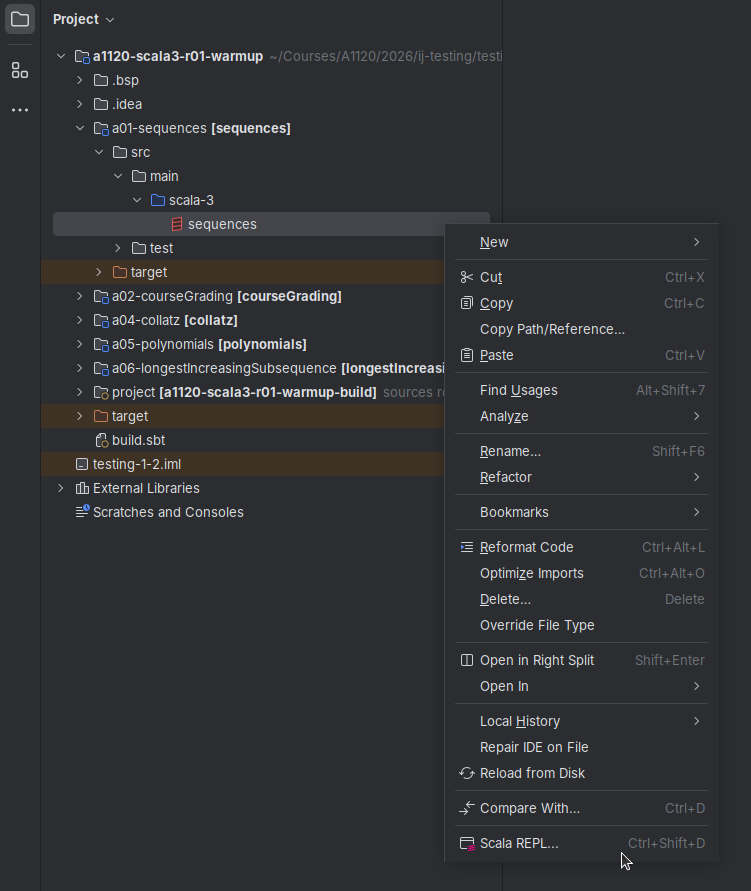
If you have problems opening the REPL from the exercise module, try from one of the scala files.
This should address the issue for the current session.
Importing the exercise package in the REPL
To have code from the exercises available in the REPL you need to import the contents of the corresponding Scala package.
Look for the package declaration at the head of the file(s) you want to import. For example, for the Sequences exercise you will see package sequences, so the name of the package is sequences.
To make the declarations in this package available in your REPL you can then do:
import sequences.*
The * is a wildcard that means “import all definitions in this package”, you could also give a specific name if you only want to import that.
Note that if you get an Not Found Error, this means that you have either spelled the package name wrong, or opened a REPL that isn’t aware of the exercise. See above for how to open one that can find the source files.